I’ve been fortunate enough to own an ASUS TUF RTX 3080 OC since January. It’s a great gaming card but I was slightly surprised with the memory thermal performance, noticing \(T_{junction}\) spikes up to 104°C in certain circumstances (hello DLSS + Ray Tracing). It seems this is still within okay-ish bounds (see the excellent igor’sLAB investigation on the matter), but not too far from throttling…
Since I expected the factory thermal pads were ~6-8 W/mK, I decided I would try to replace them with 12 W/mK pads (in my case, GELID GP-Extreme).
Factory thermal pad layout
Here are my notes from an evening inspecting the card’s internals:
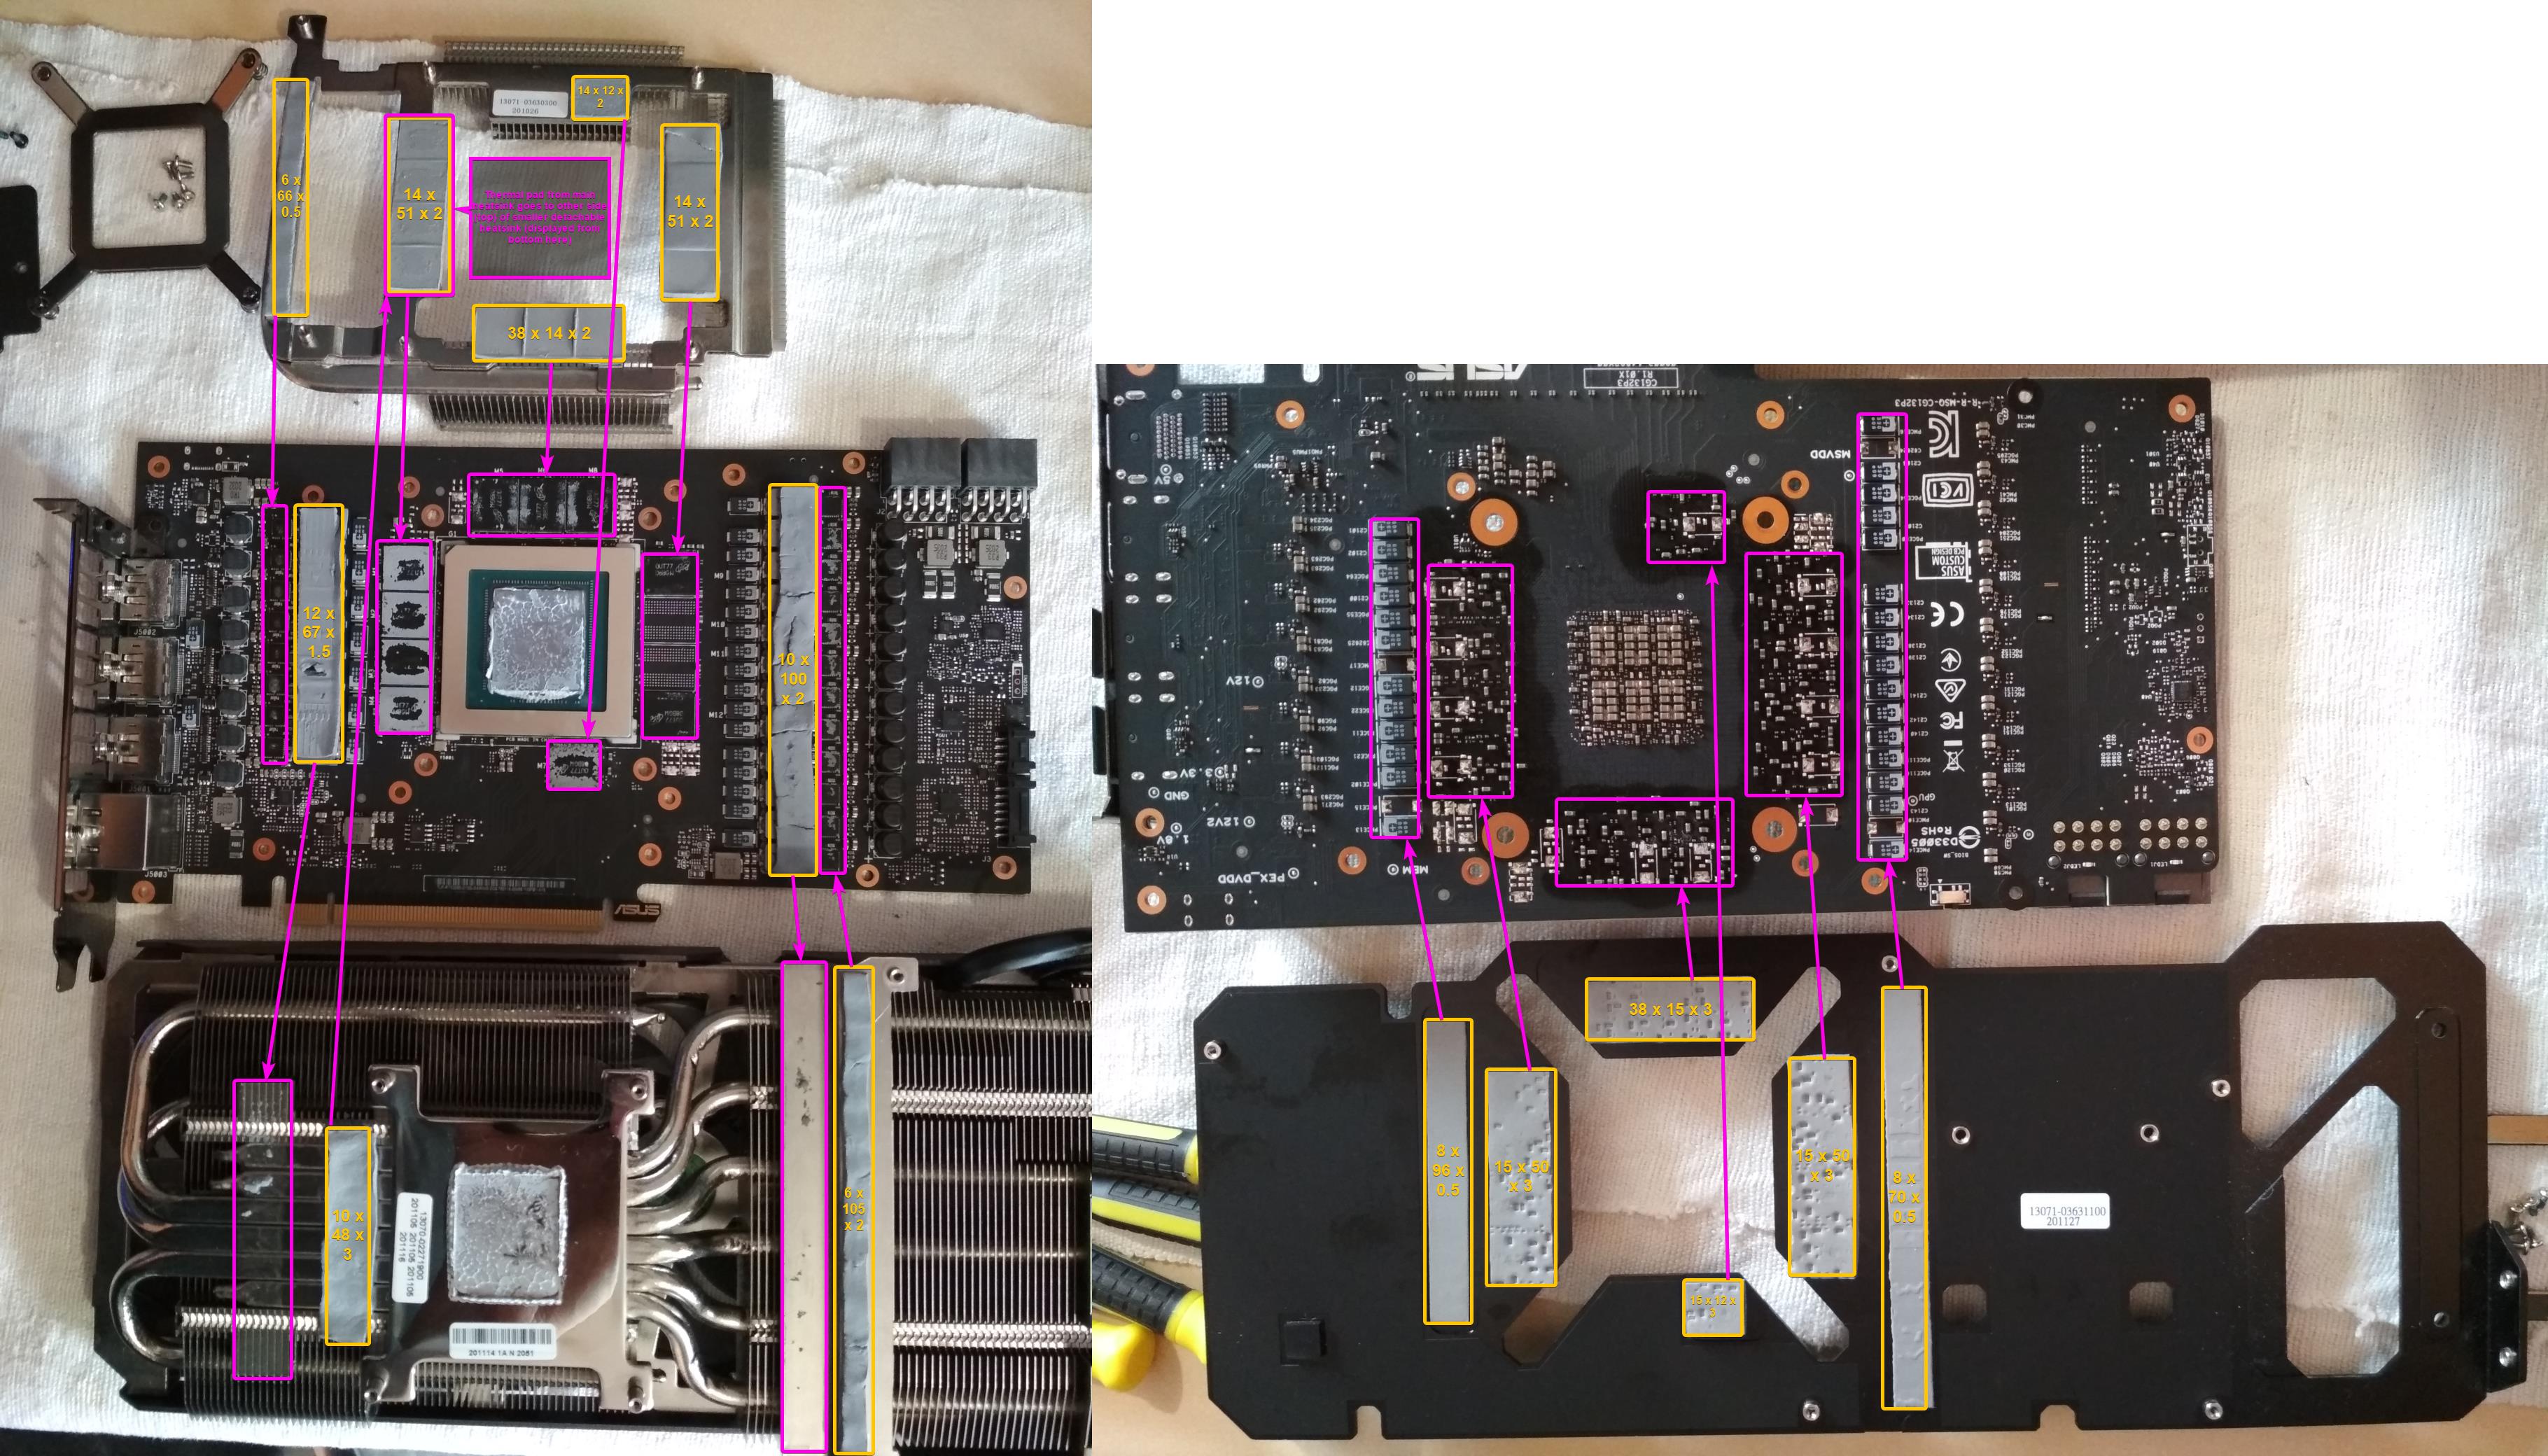
Legend:
- Yellow marks the factory position of each thermal pad along with its size and thickness.
- Purple marks the corresponding contact point of each thermal pad against another part.
List of parts, from top to bottom:
- Left side:
- Bottom side of intermediate heatsink, sandwiched between PCB and main heatsink.
- Top side of PCB, with GPU in the center.
- Bottom side of the main heatsink, fans being on the opposite side.
- Right side:
- Bottom side of PCB.
- Top side of backplate, the card markings being on the opposite side.
The memory modules are the 10 chips around the GPU – 4 left / 3 above / 2 right / 1 below. For these, heat is transferred both ways:
- Upwards: memory → pad → intermediate heatsink (→ pad) → main heatsink
- Downwards: memory → bottom side of PCB → pad → backplate
Replacing the thermal pads
Note if this is the first time you are replacing thermal pads: the existing pads may or may not break during disassembly. I recommend you plan a supply of thermal pads at various thicknesses in advance, rather than just what you think you’ll need.
See it as you see screws: it’s an investment, a stock to draw from whenever tinkering. You’ll use it again for modding future cards, or to cool M.2 SSDs, etc.
You’ll also need to replace the GPU thermal paste, so make sure to have some lying around. Likewise, it’s a stock you’ll be able to reuse later 😉
I replaced most thermal pads identically, but I changed the thickness of some that did not make proper contact:
- Both 0.5 mm pads on the bottom side of the backplate → 1 mm.
- The 6 x 66 x 0.5 mm pad on the bottom side of the intermediate heatsink, to the left → 2 mm (but I think a 1 mm or 1.5 mm would have been better).
- The 12 x 67 x 1.5 mm pad on the top side of PCB, to the left of the GPU → 2 mm.
- The 10 x 100 x 2 mm pad on the top side of PCB, to the right of the GPU → 3 mm (2.5 mm would have been better).
The GELID GP-Extreme pads are quite squishy, hence why I decided I could get away with leaving be the pads with excess thickness.
Anecdotal results on my end: temperature spikes dropped down to 97°C, which is already great!
Improvements
This afternoon I disassembled the card again and noticed the factory pad layout between intermediate and main heatsink could be slightly improved by:
- Adding an additional 10 x 51 x 3 mm pad on the right, to have the intermediate heatsink make solid contact with the pipes of the main heatsink.
- Enlarging the 3 mm pad on the left to fill the whole space available on the intermediate heatsink, which is 15 x 52 instead of 10 x 48.
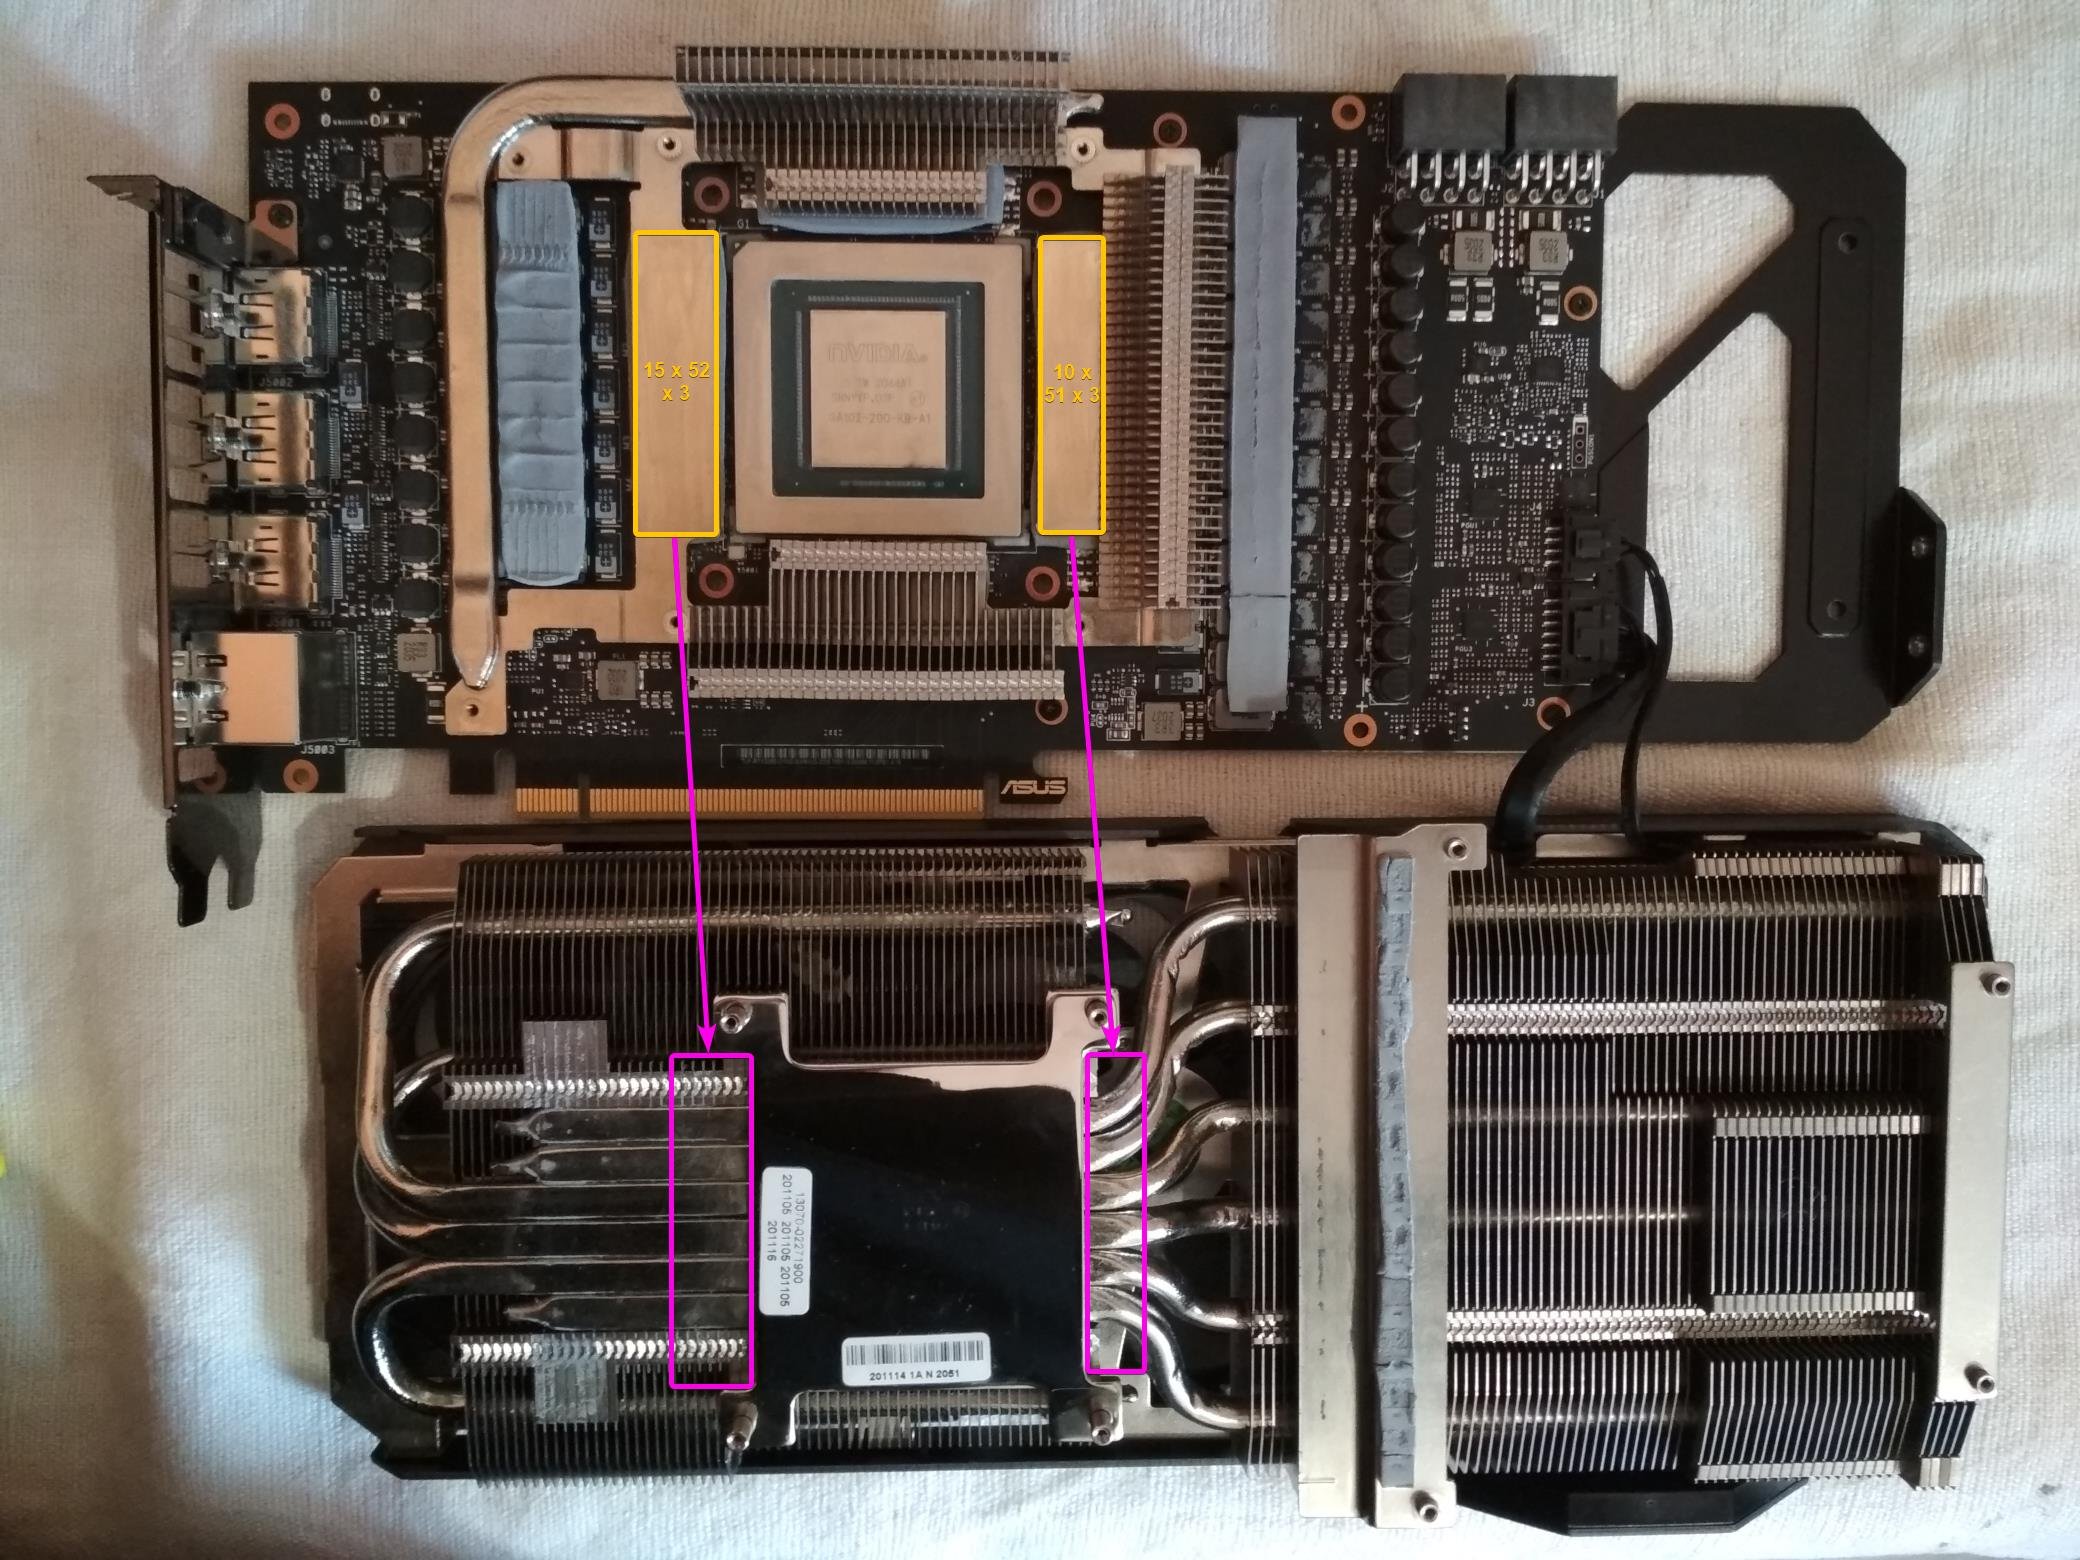
My assumption being that this should help transfer heat a bit more efficiently from the intermediate heatsink to the main heatsink, especially for the memory modules on the right side of the GPU.
And indeed, memory junction temperature now never exceeds 93°C… 😎

